Back to Energy Manager Main Menu
Saved reports
Energy Manager allows you to save reports you run frequently, and even set them up to run on a certain schedule.

How to save a report
- Start by running the report you want to save.
- Once you have run the report, click Add in the Saved Report bar.

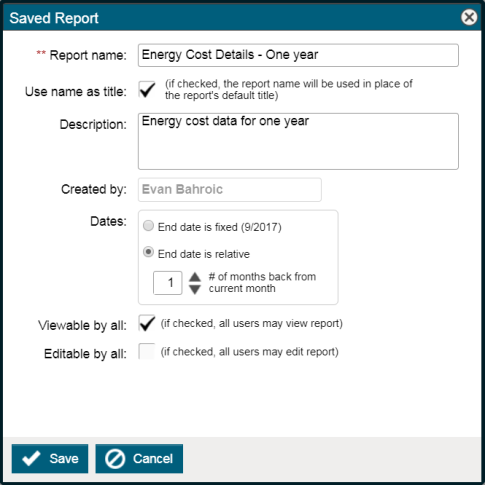
- In the Saved Report pop-up window, enter any appropriate information for this saved report. We recommend adding identifying details to the Report name such as the time period or the selected facility.
-
Select an option for the end date. This can either be the fixed date that was selected when you ran the report, or you can choose a relative end date.
- Selecting the fixed date will use the same date range each time the report is run.
- Selecting a relative end date allows the report to adjust the reporting date range based on the date it is run. This option is important if you plan to set up a schedule for this report to run on a recurring basis as it will update the date range each time it is run.
- Select how many months back from the current month that the report should exclude. For example, if you want the report to exclude the current month you are in, select a 1 here.
- Click Save to add this saved report to Energy Manager.
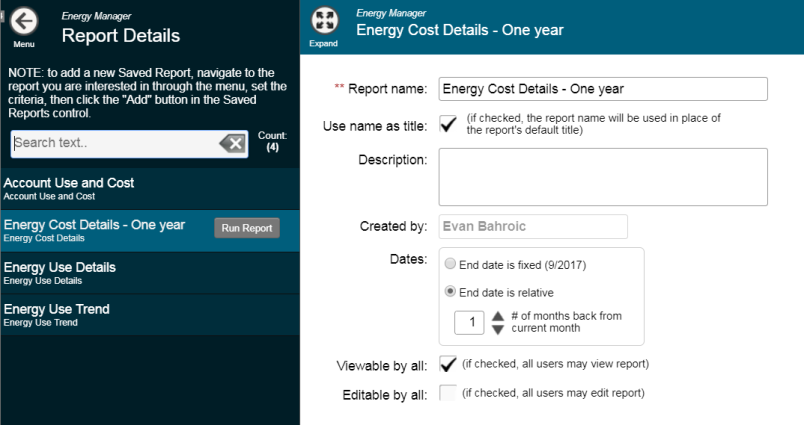
- Once you have saved the report, it will show in the Saved Report drop down on that report page, as well as in the Saved Reports list from the Reports & Charts main menu option. From either location you can quickly run the report with the saved time period and facility selections.

How to schedule a saved report
After saving the report, you have the option of also setting up the report to run on a schedule.
- Click on Reports & Charts from the main menu, then click on Saved Reports.
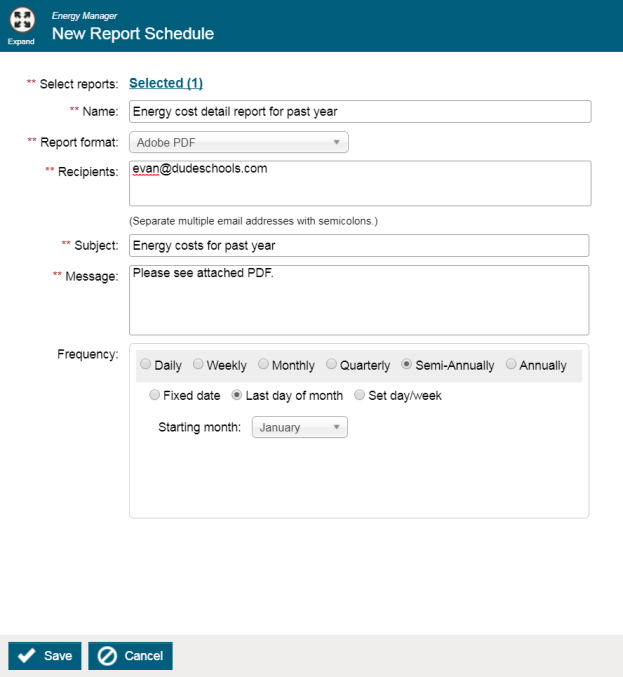
- Select Schedule Setup, then click on Add Schedule.
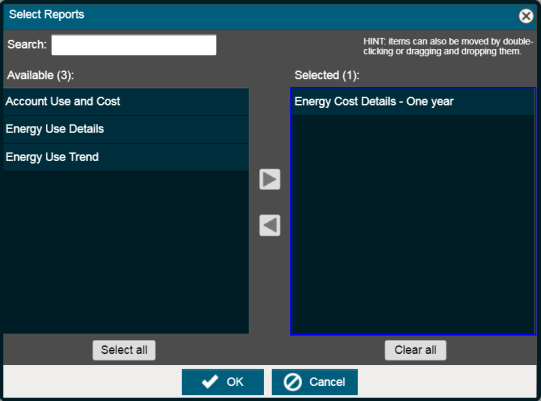
- Click the Selected link to open the Select Reports pop-up window.
- Choose the report(s) you would like to schedule by using the arrow, or click and drag the report(s) to the Selected column.
- Click OK to add these reports to the schedule.
- Enter a Name for the report schedule, and select a Report format from the drop down menu.
- Enter the email addresses for any Recipients, separated by semicolons (;). These users do not have to be users in Energy Manager.
- Enter a Subject and Message for the email.
- Choose the Frequency for this report schedule. Depending on the frequency type you choose, there will be more detailed information to select to determine exactly when the report should be generated and emailed.
- Click Save to add this report schedule to Energy Manager.